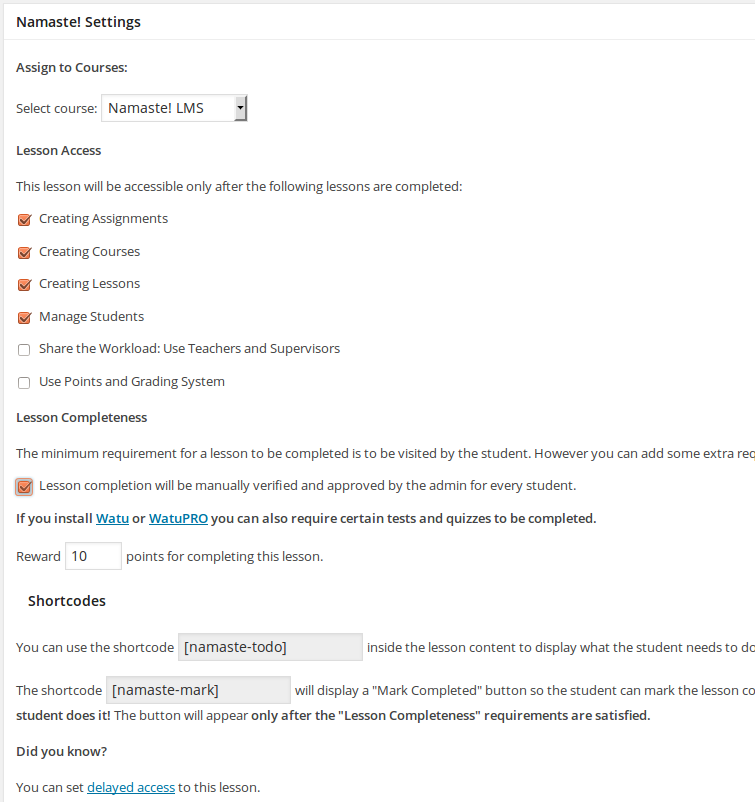
To create a lesson go to the Lessons menu under Namaste! LMS and create one. All the content and media you want to include can be included inside the lesson just like in any regular WordPress post. Any content provided by third party plugins (usually through shortcodes) can also be included.
Each lesson has:
- Course it belongs to
- Lesson access setting. At the time of creating it says that there are no other lessons, but once you save it, you will be able to see all other lessons in the course. You will be able to select some of them to be completed before this course becomes accessible.
- Lesson completeness. You can require manual approval by admin, completed assignments, or a Watu or WatuPRO quiz to be completed with given result.
There are also two shortcodes you can use:
- The namaste-todo shortcode will display the items still required to have the lesson completed. This may be a quiz, assignment etc.
- The namaste-mark shortcode lets you include a “Mark as completed” button so the student can decide themselves when the lesson is completed. If such button is included in the lesson it will not be marked as completed until the student does it! The button will appear only after the “Lesson Completeness” requirements are satisfied.
Note that lessons by default don’t show up on your homepage. If you wish to show them, you need to enable the following setting at Namaste! LMS Settings page:


